Halide, Darkroom and Rekindling Photography as a Hobby
A few years ago, my photography workflow broke. I can’t remember exactly when, but there was a sort of cascading effect once it became clear Apple didn’t want to support Aperture anymore.1 From there I stopped bringing my Nikon D90 around with me, and my photo collection began to wither.
When Apple first showed off the iPhone 7 Plus with the dual-lens camera and Portrait Mode, it blew me away. I wanted it to become my new, everyday camera. It has been, but until recently was using it exactly as I had all my other iPhones; it didn’t feel like a camera. Two apps, Halide and Darkroom, have changed that for me. I’m having a total blast taking photos again.
The key feature of deluxe camera app Halide, for me, is speed. When you take a photo, you feel a little haptic feedback. The screen doesn’t blink or freeze frame. On to the next shot. It feels almost like shooting with a Leica or other rangefinder. You compose the shot, set focus and exposure, then move on.
If you’ve never shot with a rangefinder, this may seem a bit abstract. With an SLR, you can see what the shot will look like when you compose it; with a rangefinder, you can’t (exactly).2 The result is that you end up training your eye to see what your next photo will look like without looking through an eyepiece. Halide has basically gotten me into that sort of thinking. I’m more dexterous with it than I ever was in Apple’s built in Camera app.
Of course, Halide has a bevy of other features. It can shoot RAW, has manual controls like ISO and shutter speed, and it even has its own take on Portrait Mode, called Depth. I’ve used a number of beefed up camera apps over the years, and Halide is easily the most intuitive to use.
The main feature that blew me away was shooting RAW. Halide’s designer, Sebastiaan de With, has an excellent series on the topic, but here’s a quick example that made me want to shoot everything RAW. Halide allows you to shoot both RAW and JPG, the latter of which will have all the noise reduction and color correction the built in Camera app offers. This is a 100% crop of a photo I took as a JPG.
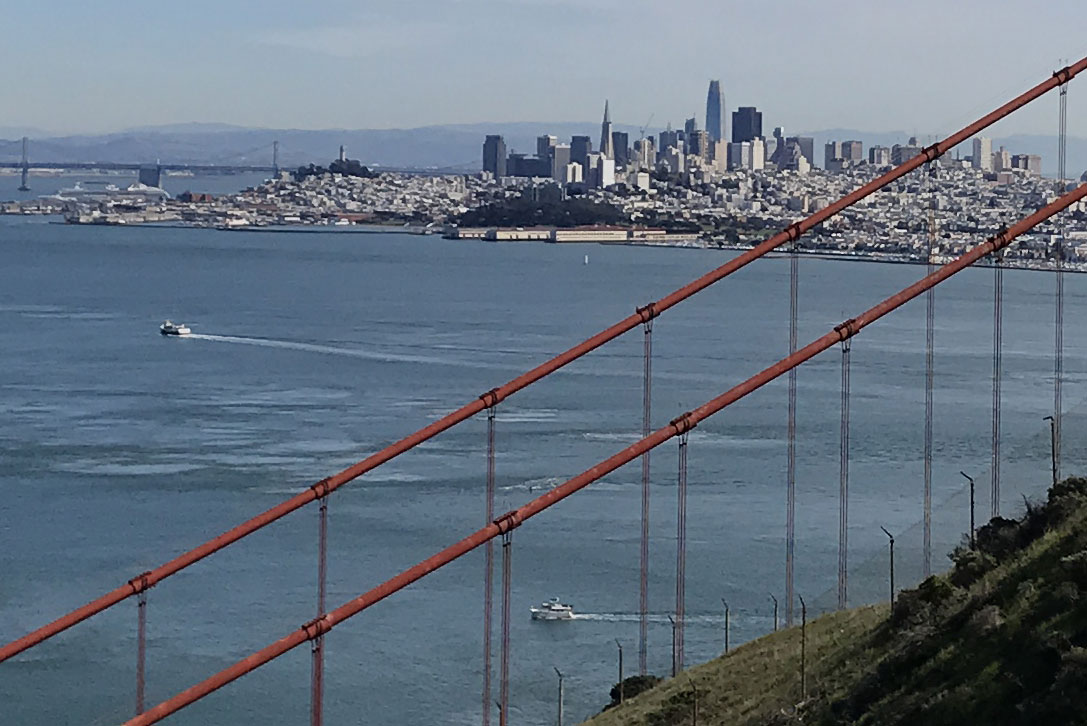
JPG Crop
Now here’s the same photo in RAW.
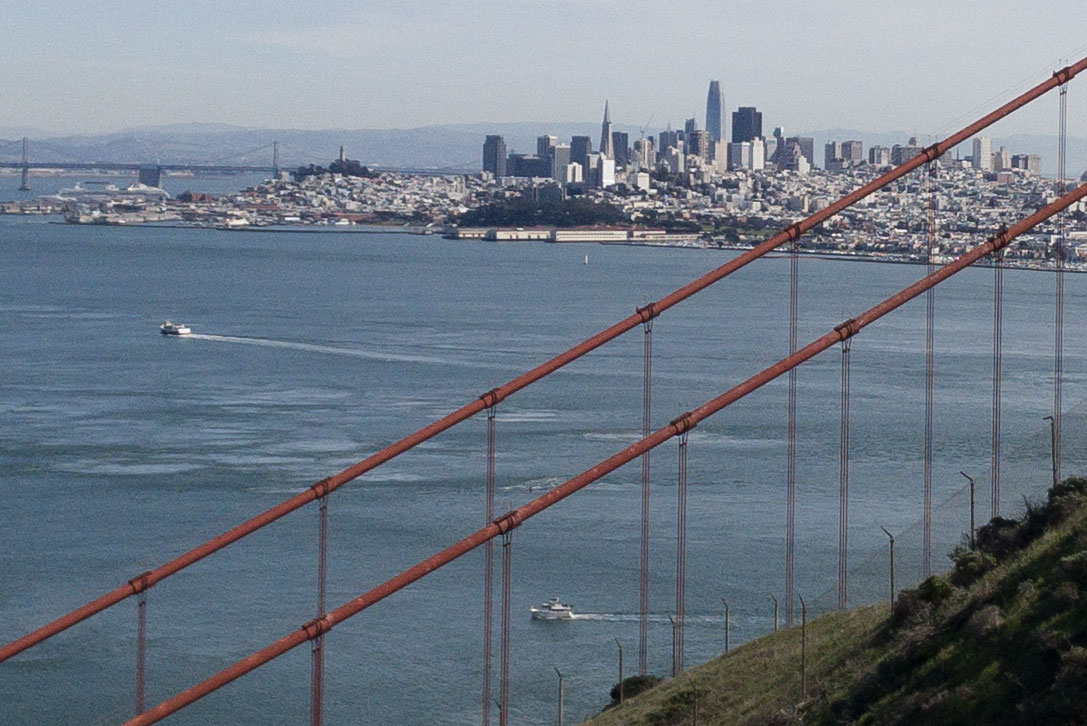
RAW Crop
In this example, the RAW version retains a lot of information that the JPG does away with. Sure, there’s noise, but beneath that noise is a ton of detail. The boats look sharper and each of the cables on the bridge are more distinct in the RAW version. Here’s the whole shot, as edited in Darkroom.
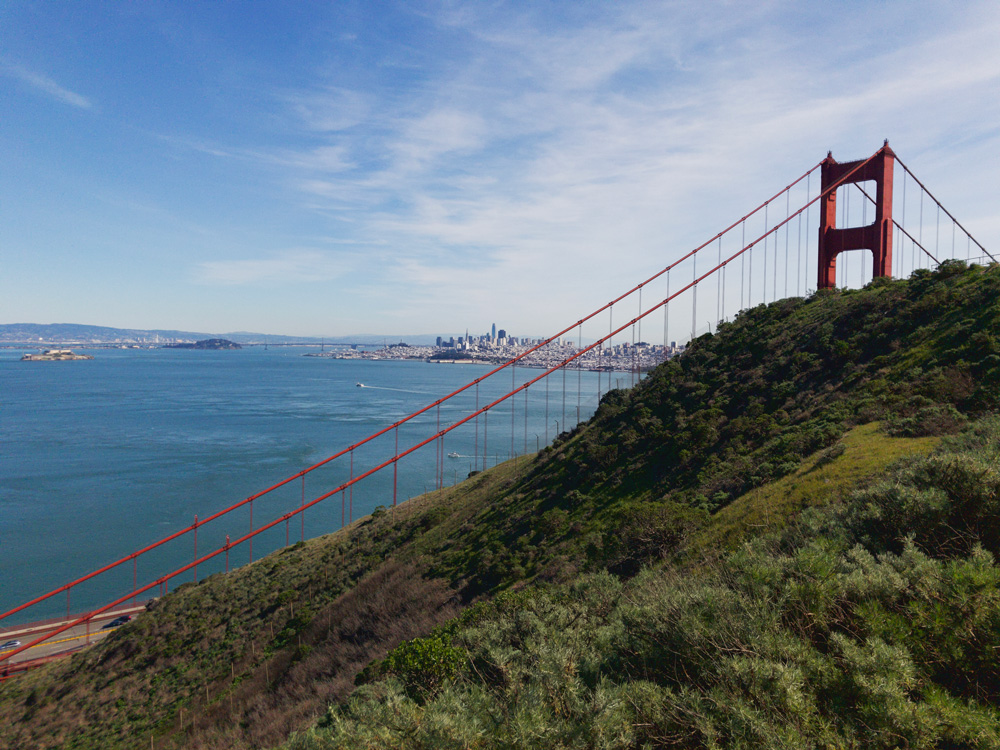
The Full Photo
Darkroom is a fantastic photo editing app that just released a huge update. Besides the photo adjustment tools the app has been honing over the years, they’ve added the ability to adjust the depth map on Portrait Mode photos. This means you can increase or decrease the amount of blur behind your subject. They’ve taken it a step further, allowing you to adjust the edges of what is in the foreground and in the background. And you can even do things like adjust the saturation, brightness and contrast of the foreground and background separately.
I’ve been using the beta for a little while, and this makes Portrait photos a ton more fun to play with. I find that, more often than not, I’m reducing the amount of blur. Portrait mode tends to treat most photos as if they were taken with an 85 or 105mm lens, which is appropriate as these are often referred to as “portrait” lenses (get it?!). But Sometimes I frame a photo that feels a lot more like a 50 or even a 35mm lens. Pulling the blur back allows for a subtler effect mimicking a wider array of lenses. Here’s an example.
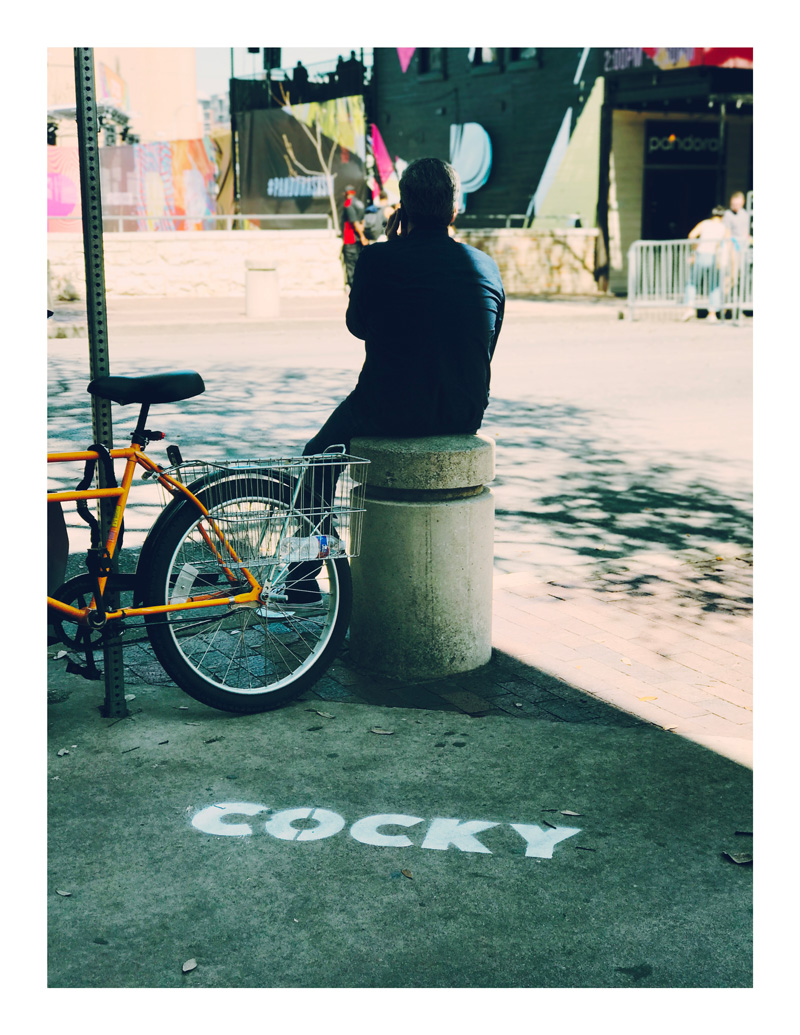
A Portrait Mode Street Photo
The blur adds just enough separation between the subject and the background. This feels a lot more like a photo taken with a street lens, to me at least. It’s more blur than I would get with the lenses on their own, but less than what Apple’s algorithms tend to ask for.
One more portrait photo, taken amid the cacophony of a red carpet before the premiere of Wes Anderson’s Isle of Dogs at SXSW.
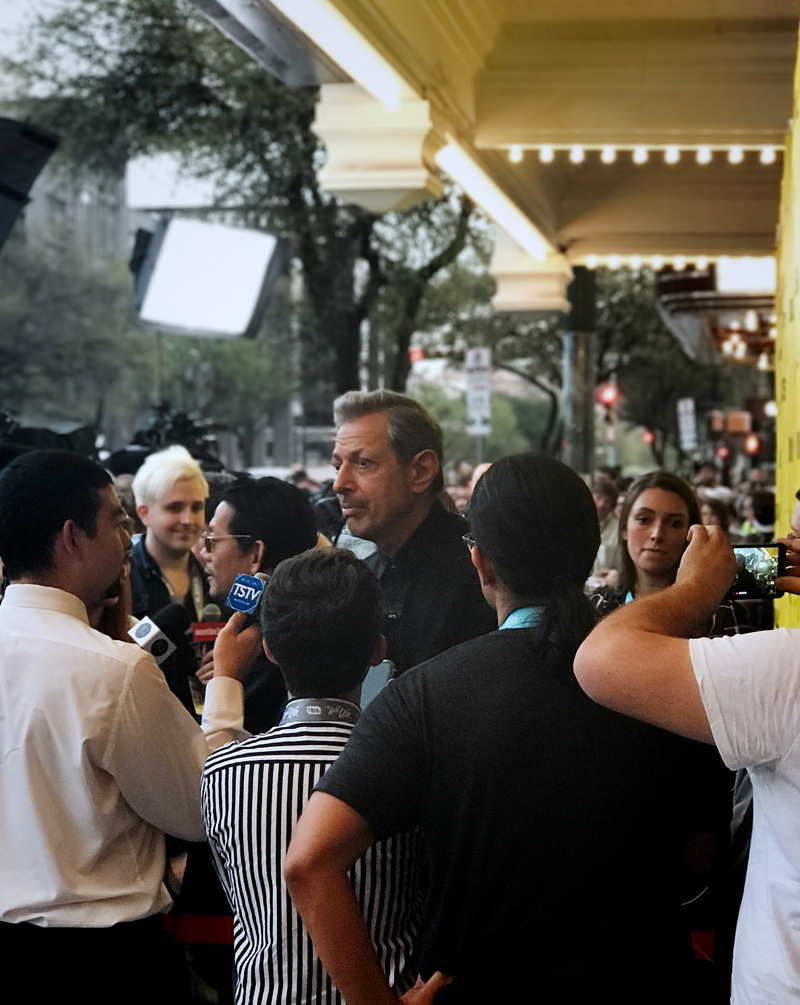
Jeff Goldblum before Isle of Dogs
I felt like I was pushing my phone to the limits, and didn’t think any depth information would show up at the distance I was standing. But somehow it does its little magic and grabs a fairly clean shot. I took some photos with my SLR as well; they’re much nicer, although since I was shooting into lights there was a lot of glare streaking over the subjects. The tiny iPhone lenses didn’t seem as phased by that. But honestly it was just fun to try to get a shot like this on my phone.
There are loads of other features in both of these apps. If you want to read more on them, I suggest Federico Viticci’s recent Halide walkthrough or Darkroom’s own blog. Though made by different companies, they go hand in hand. Each even has the ability to jump to the other app with a single tap.
I still love taking photos with my Nikon D90, but there’s no question that my iPhone is now my main camera. Halide has reinvigorated my little hobby, and Darkroom has made it so I can turn my snapshots into something beautiful right from my phone. I’m excited to see what they add next.
Halide is $4.99 and Darkroom is free with in-app purchases up to $7.99 (you’re going to want to just buy every feature). Go get them and take some great photos.
-
Which, in what has become true Apple “pro” fashion, was well before they actually killed the application off. ↩︎
-
This isn’t a 1:1 analogy. Halide allows you to preview focus live, which a rangefinder would not, and switching to the telephoto lens shows you the telephoto preview. On a rangefinder the frame lines would simply shrink in your eyepiece. Like I said, this is more an abstract feeling than an exact comparison. ↩︎